That’s right. I said it … Maple Pancake Cupcakes with Whiskey Maple Frosting and Candied Bacon. Let it all sink in. That just happened. This master piece was actually just baked. It does exist. And it is delicious.
Disclaimer … I am a vegetarian, and I occasionally sneak a piece of bacon. I have no shame. But don’t worry, you could make this recipe without bacon too!
I first saw this recipe on my sorority sister’s blog, Bri’s Bakes. With Joe’s birthday quickly approaching, I wanted to bake up something new that he would love. These seemed like the perfect birthday treat. I made a few slight modifications to the original recipe, but these were a hit. The batch is already half gone … No big deal.
What You Need For The Cupcakes
2 1/2 Cups of flour (I used whole wheat flour … don’t tell Joe!)
2 Teaspoons baking powder
1 Teaspoon baking soda
1/2 Teaspoon salt
3/4 Teaspoon ground ginger (I subbed this for cinnamon … remember ‘cook with what you have!’)
1 Stick unsalted butter, softened
1/2 Cup brown sugar
2 Eggs
1 1/4 Cups Maple Syrup
2 Teaspoons vanilla extract
1/2 Cup buttermilk (I used low fat)
1/2 Cup crispy bacon
What You Need for the Frosting
2 Sticks unsalted butter, softened
2 Teaspoons vanilla extract
1 pound (1 box) of confectioner’s sugar
1/4 Cup whiskey (I used Jack, but any whiskey or bourbon will do)
1/4 Cup maple syrup (the original recipe uses 1/3 cup maple syrup and no whiskey)
What You Need for the Candied Bacon
6 Pieces of bacon
Brown Sugar

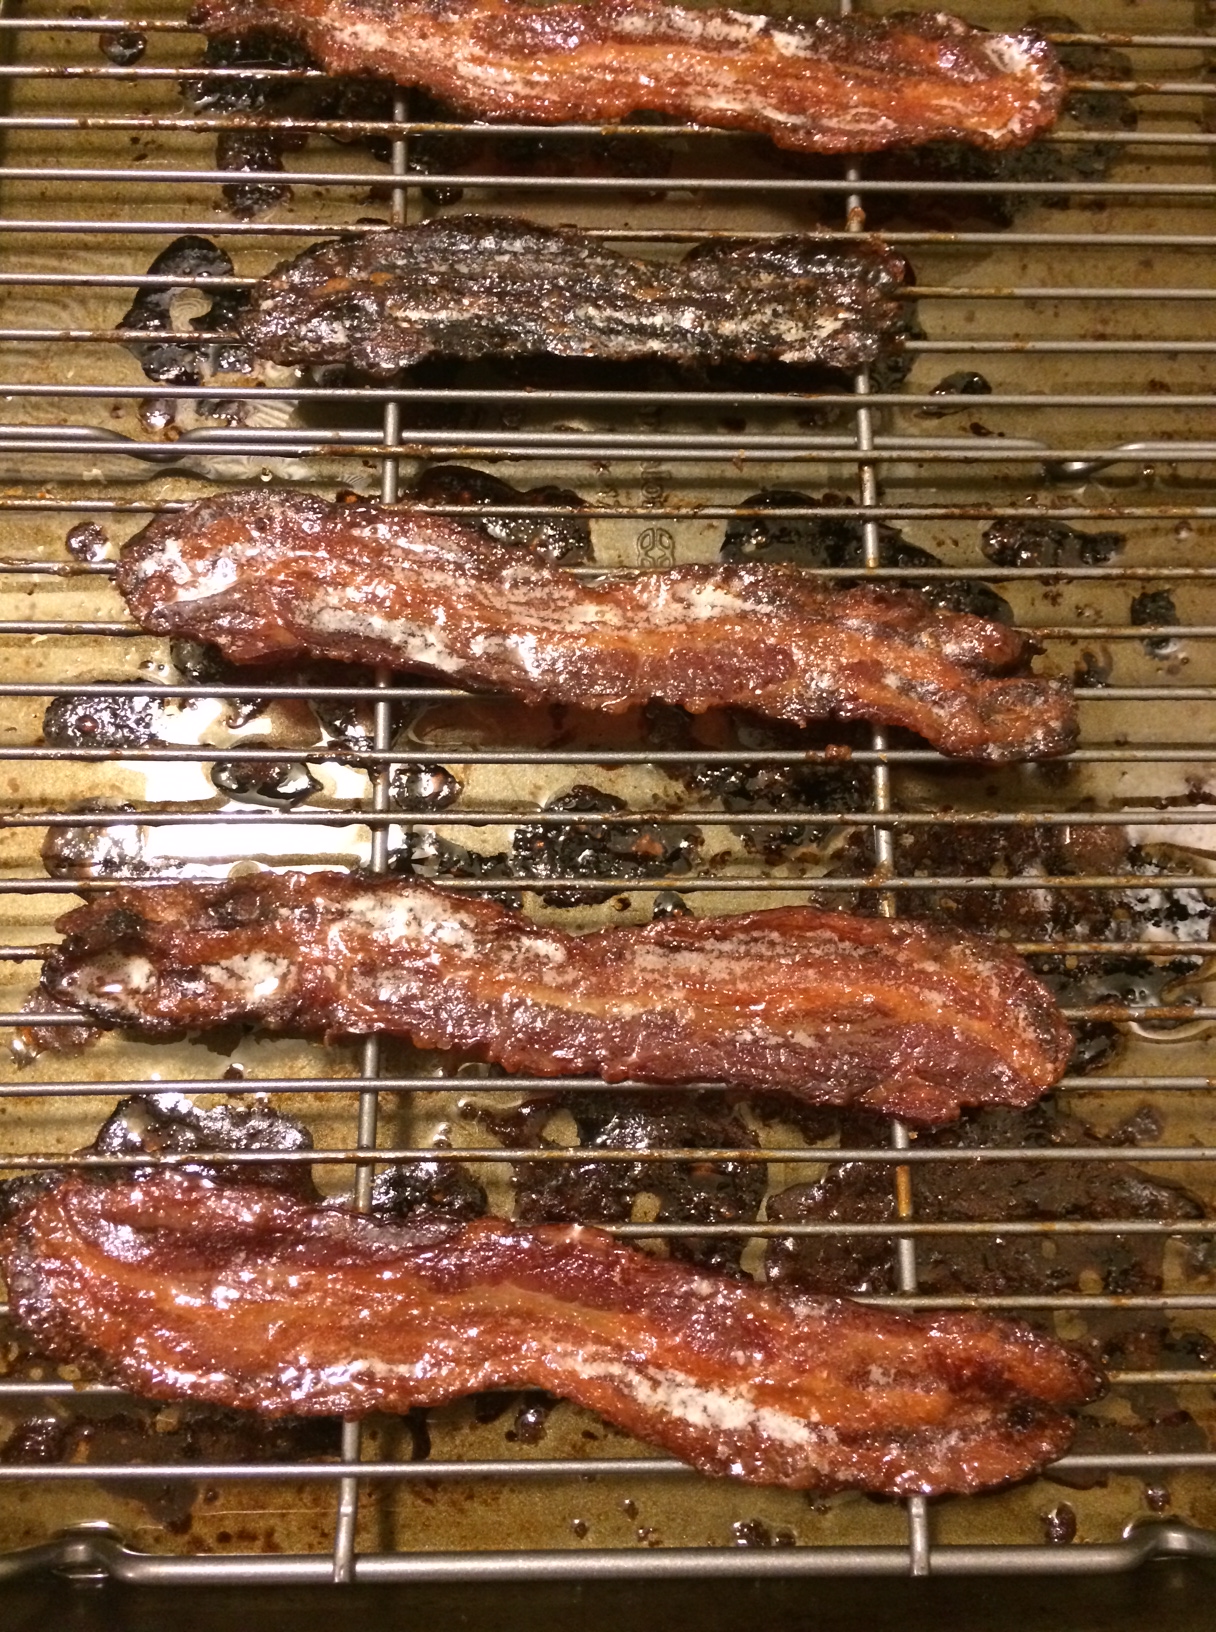
First preheat the oven to 350 degrees. Next, place a cooling rack on top of a backing sheet. This will allow the bacon grease to drip off the bacon without getting all over your oven. Next, rub six pieces of bacon with brown sugar. Lay bacon across the cooling rack and place in oven until crispy. This should take about 20 minutes depending on the cut of bacon you use.

When the candied bacon is done, it will look crispy and brown. Allow to cool, then crumble and save for topping the cupcakes with later.
Next, take the remainder of the bacon and cut into one inch pieces. Cook bacon until crispy in a skillet. When done, place on a paper towel to absorb the oil and set aside for later. Reserve the bacon grease for the cupcake batter.

Now that the bacon is all done, sift together the flour, baking soda, baking powder, salt, and ginger (or cinnamon). Set aside. In a stand mixer, cream together butter and brown sugar. Add eggs one at a time, followed by the vanilla extract (see my earlier post … Extracts Don’t Have To Be So Expensive), and maple syrup. I highly recommend using real maple syrup and not pancake syrup. You will taste a difference! Please note, at this point the mixture will seem very soupy. Next, begin adding in the dry mixture a little bit at a time, alternating with the buttermilk. The mixture will thicken up into a batter.
Chop the crispy bacon from earlier and add to the mixture. If you feel so inclined, Brianna recommends adding in the reserved bacon grease for added flavor.

Line your muffin tins and fill each about halfway.

Brianna recommends baking 16-20 minutes. My batch took about 18 minutes, but every oven is different. Use a toothpick to check if the cupcakes are done or not. Once inserted, the toothpick should come out clean if they are thoroughly cooked. Allow these to cool at least 30 minutes before icing.

Now lets move on to the best part … the frosting! In a stand mixer, mix together soften butter, vanilla, maple syrup, and frosting. The consistency will be smooth and creamy when done. I didn’t ice my cupcakes until the next day. If you do the same, be sure to let the icing soften slightly before piping onto the cupcakes, or it won’t come out of the pastry bag smoothly.

Once iced, top cupcakes with candied bacon and enjoy. And by enjoy, I mean enjoy two. You won’t be able to say no! Thanks Briana for the great recipe!

